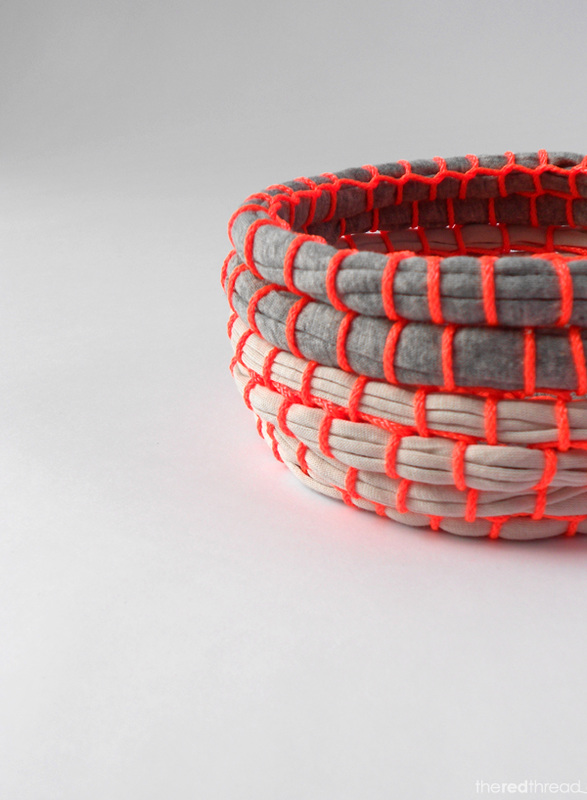
yarn bowl
objective: students will utilize coiling techniques and yarn to create a designed bowl, coaster, or vase.
steps:
|
First, cut your coil as long or short as you may want your project to be. you will not be able to add any length after this step.
|
|
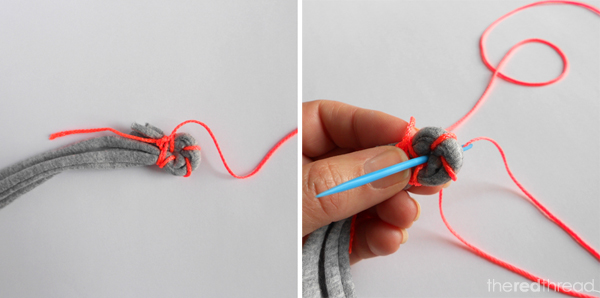
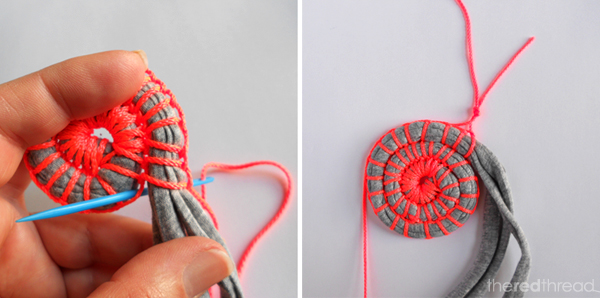
Fold the end of the grey yarn over to form a loop. Keep the hole in the center as small as you can – it should be just big enough to fit the needle through as it will get bigger as you stitch around the yarn. Wrap the cord around the base of the yarn loop, leaving a short tail sticking out, and tie a knot. (as in the left hand image below). Hold the yarn as shown with the short tail on top and the long piece of yarn on the bottom. Take the needle around to the back of the loop and pass it through the hole towards you (right hand image).
|

|
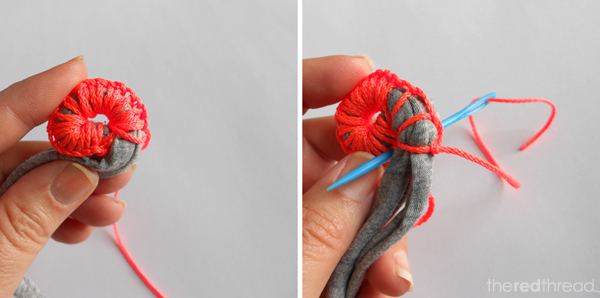
Fold over the starting tail of the orange cord and the short tail of the grey yarn with the long grey yarn on top (left hand image below). Your next stitch will go through the top of your very first blanket stitch, instead of through the hole. Take the needle over to the back and bring it through the top of the first blanket stitch. Your next stitch will go through the top of the second blanket stitch. Scroll down to the next photo for a better look at where the needle passes through.
|
|
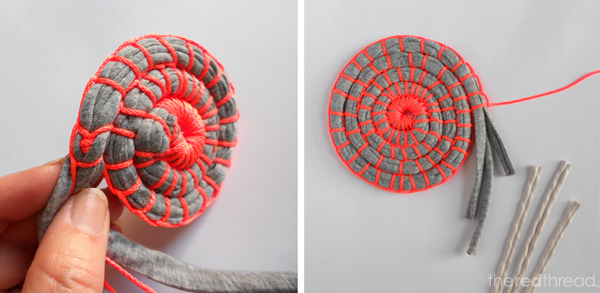
You’ve done a lot of stitches and will probably run out of cord soon. The photo below on the right shows how to add a new length of cord. Knot the two pieces together so the knot is on the outside of the coil.
|
|
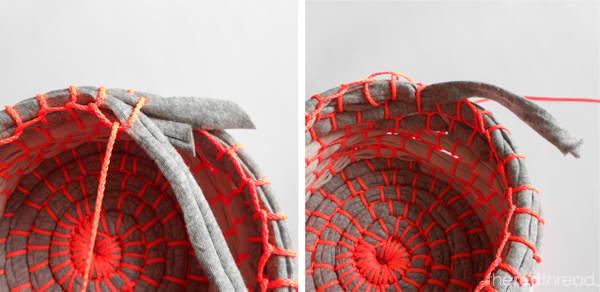
Run the tails along the grey yarn and tuck them and the knot in as you continue to stitch (see image below left). As my coil grew I occasionally added an extra stitch when I thought they were getting too far apart. Remember not to pull the stitches too tight, or the base of the bowl won’t stay flat.
When you run out of yarn or want to change colours all you have to do is overlap the old and the new. As I was using three strands of yarn I cut each one a different length and inserted the new ones into the middle of them, so there wouldn’t be bulk all in one place. |
|
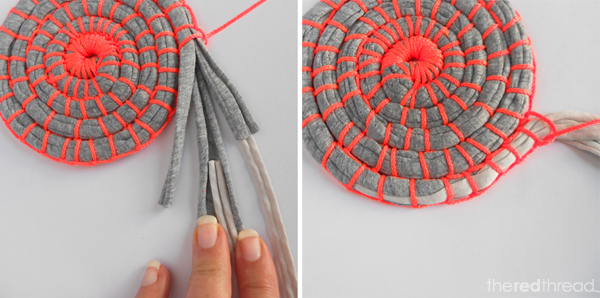
As the fabric yarn tends to curl up I opened each piece up and inserted the new one into it. Then just continue on stitching.
building up
|
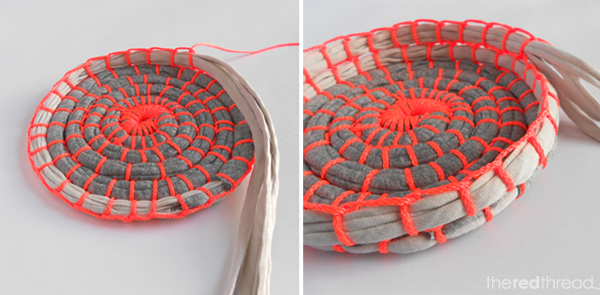
When you’re happy with the size of the base you can start building up the sides. Make your stitches a little firmer while holding the yarn above the previous coil, instead of next to it. Continue like this until you have reached the desired height.
If you decide not to build up, you can continue building out to create a coaster or placemat type of work. |
finishing...
|
Finishing off. If you’re using more than one strand of yarn cut them at staggered lengths to lessen the bulk. Continue stitching around until you have just one strand left. Leave a tail of about 10 cm (4 inches) so you have enough to work with.
|
|
|
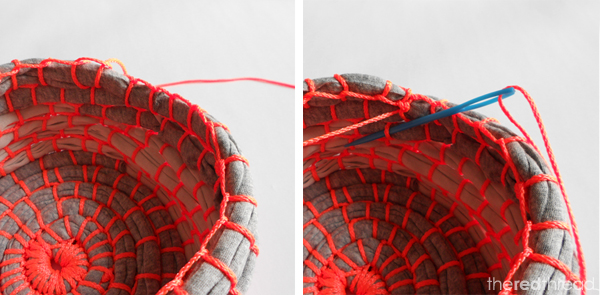
Weave the tail into one of the vertical stitches in the row below (on the inside of the bowl). Then weave in through a few more stitches in that row and cut the yarn off so the tail isn’t sticking out (image on the left below). To finish off the cord do one more stitch to complete the top edge of the bowl then tie a small knot and weave the cord down into the centre of the bowl. Cut the cord and tuck the end in.
|
|
And you’re done! I find this very addictive and I’ve made quite a few bowls and baskets of varying sizes now. It’s really quite easy once you get started. And it’s a great way to upcycle fabric.