tie dye
objective: students will manipulate fabric and dye techniques to create a finished resist.
a fun craft or ancient artform?
|
Tie-dye is a modern term invented in the mid-1960s in the United States for a set of ancient resist-dyeing techniques, and for the products of these processes.
The process of tie-dye typically consists of folding, twisting, pleating, or crumpling fabric or a garment and binding with string or rubber bands, followed by application of dye(s). The manipulations of the fabric prior to application of dye are called resists, as they partially or completely prevent the applied dye from coloring the fabric. |
tips:
- Dedicate some time to folding and bundling the fabric. The ‘folds’ (or bundles) are one of the main components in creating unique tie dye patterns as it prevents the dye from reaching certain areas – which in return, create resists.
- Each fold you make will create a line in your pattern. For smaller patterns, keep the folds narrow – for larger patterns, made the folds wider.
- Creasing and folding the fabric creates geometric-type patterns and stripes. Crumbling, scrunching or twisting the fabric create more organic-like patterns and spirals.
- When securing the fabric, make sure the rubber bands are really tight. This will not only will hold the fabric together, but will help prevent the die from seeping through the folds, creating crisp resists.
- The other main component of creating unique tie dye designs is choosing the right colors. Different color dye applied close to each other will seep together and create a ‘new’ color
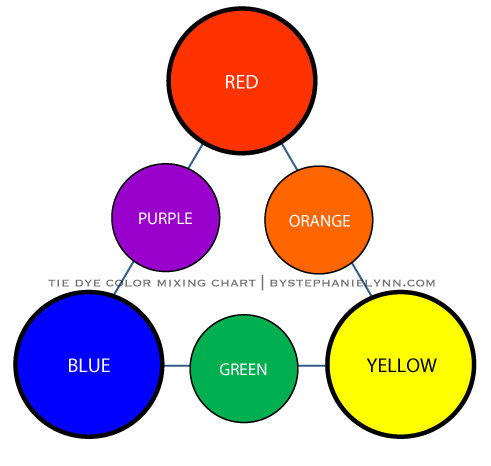
- When combining colors, stick with the primary basics.
- Avoid combining secondary colors – like orange and green, green and purple, & purple and orange – which will result in muddy brown hues.
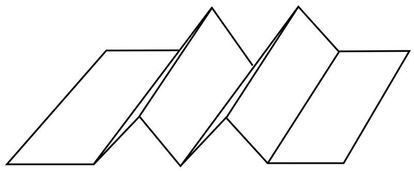
For reference: The term ‘accordion fold‘ is used below in several of the techniques. This simply means folding the fabric in a zig-zag pattern, creating a series of pleats, as shown above.
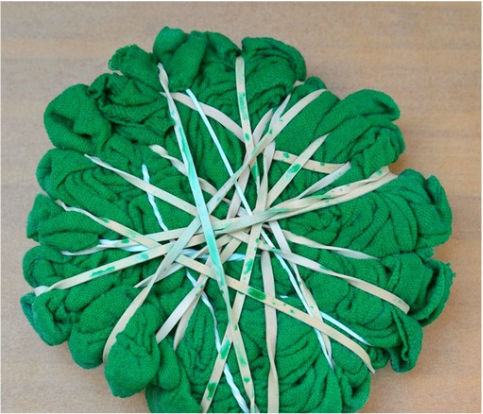
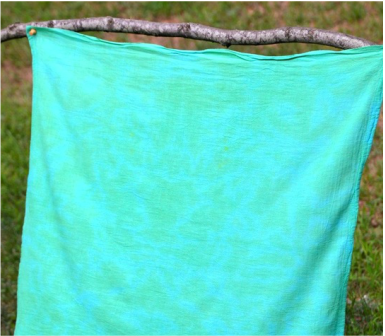
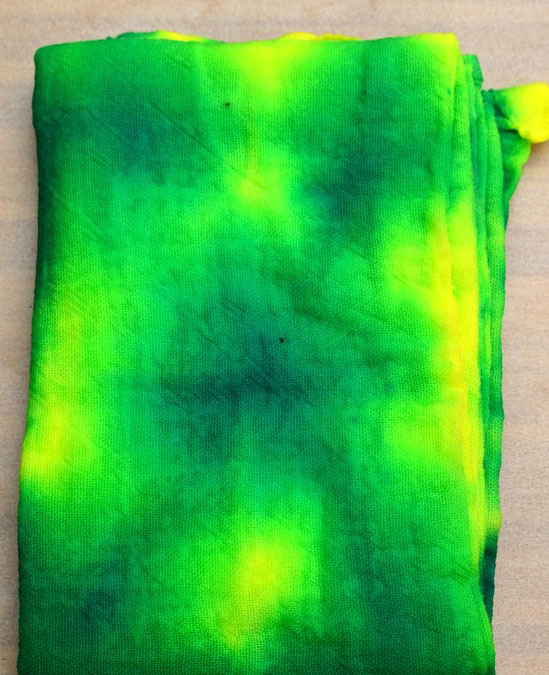
crumple dye technique
Lay the fabric flat.
Begin scrunching the fabric together with your fingers.
Continue scrunching the fabric until you have everything in a crumpled mound.
Secure tightly with rubber bands.
Apply the dye to the fabric.
Flip the fabric over and repeat on the backside.
Begin scrunching the fabric together with your fingers.
Continue scrunching the fabric until you have everything in a crumpled mound.
Secure tightly with rubber bands.
Apply the dye to the fabric.
Flip the fabric over and repeat on the backside.
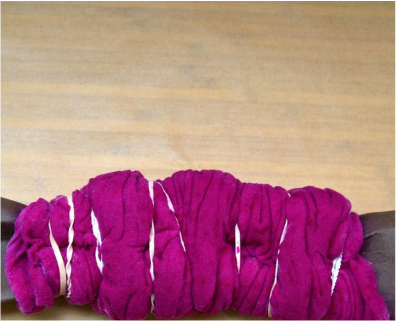
shibori technique
|
|
Lay the fabric flat.
Roll the fabric around a tube – we used a paper towel roll.
Tightly scrunch both ends of the fabric toward the center.
Secure with rubber bands.
Apply the dye to the fabric.
Rotate the tube and continue applying the dye until the fabric is completely saturated.
Roll the fabric around a tube – we used a paper towel roll.
Tightly scrunch both ends of the fabric toward the center.
Secure with rubber bands.
Apply the dye to the fabric.
Rotate the tube and continue applying the dye until the fabric is completely saturated.
|
|
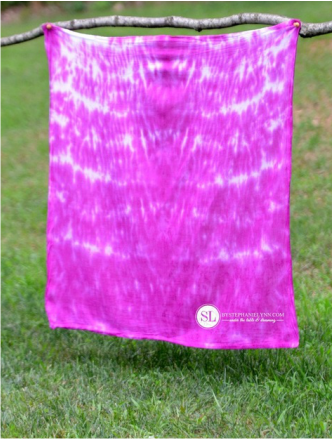
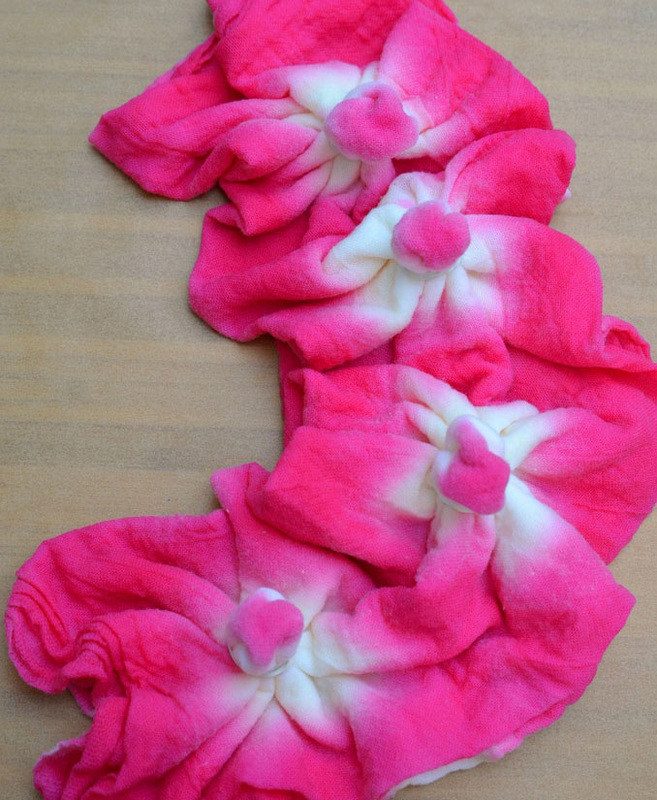
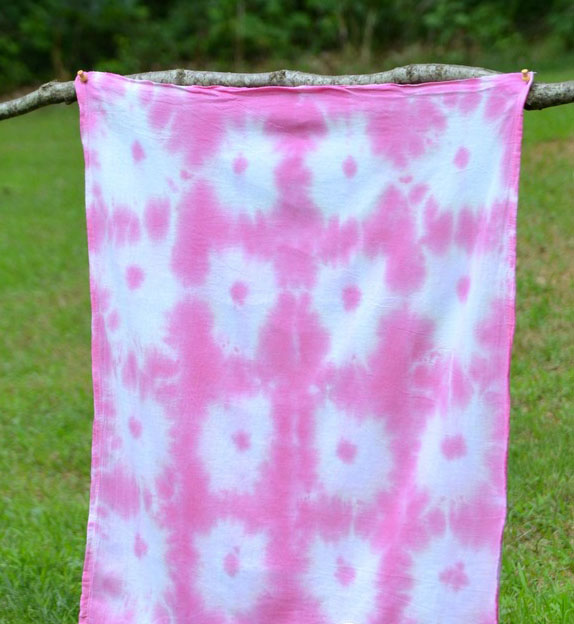
sunburst technique
Lay the fabric flat.
Fold the fabric in half.
Fold the fabric in half, again, lengthwise.
To create the sunbursts pinch the fabric and pull upward, 1 to 2 inches. Secure the fabric with a rubber band and repeat for the desired number of sunbursts.
Apply the dye to the outer edges of the fabric, the fabric between each sunburst and the center of each sunburst.
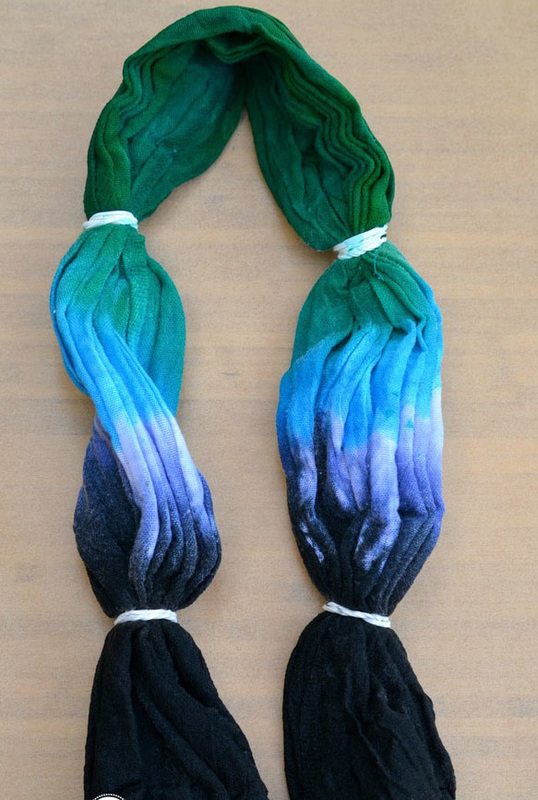
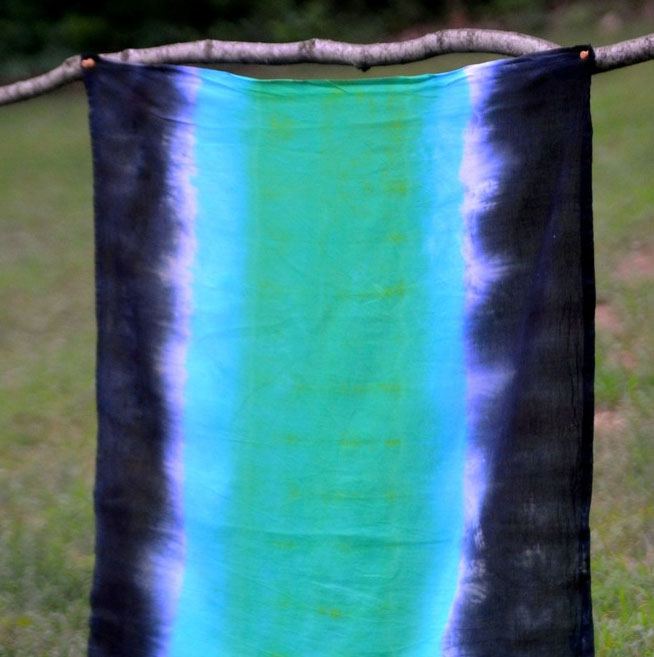
stripes technique
|
|
Lay the fabric flat.
Accordion fold the fabric from the bottom up.
Secure with rubber bands.
Apply the dye to the fabric.
Flip the fabric over and repeat on the backside.*For this particular design only two colors of dye were used. Black dye was applied to the ends, completely saturating the fabric up to the rubber bands. Then green dye was applied to the center section – completely saturating the fabric, up to the rubber bands. The fabric was then flipped over and the dye was repeated on the backside. As the dye processes it will seep through the fabric and create the ombre effect, as shown above.
|
|
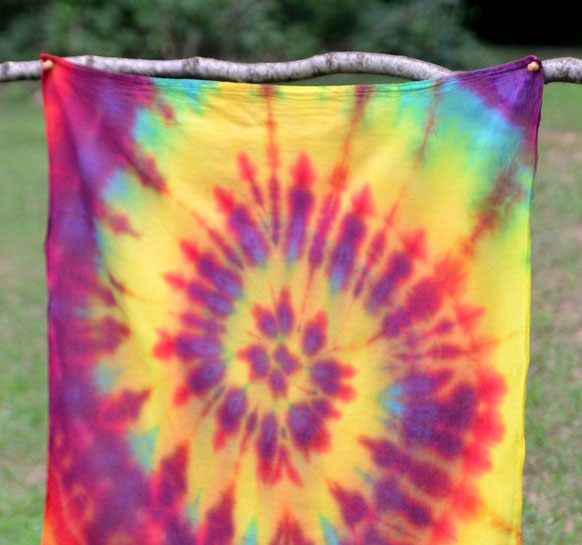
spiral technique
Lay the fabric flat.
Pinch the fabric in the center.
Begin twisting the fabric in a circular motion and continue until all of the fabric is in a spiral shape.
Secure the spiral with three rubber bands, creating a wedge effect, as shown above.
Apply the dye to the fabric.
Flip the fabric over and repeat on the backside.
* For this particular design three different colors of dye were used. Yellow dye was applied to three consecutive wedges. Then, overlapping one of the yellow wedges, magenta dye was applied to three consecutive wedges. Lastly, overlapping two of the magenta wedges, green dye was applied to three consecutive wedges, with a heavy concentration on the center wedge – as shown above. The fabric was then flipped over and the dye was repeated on the backside.
|
|
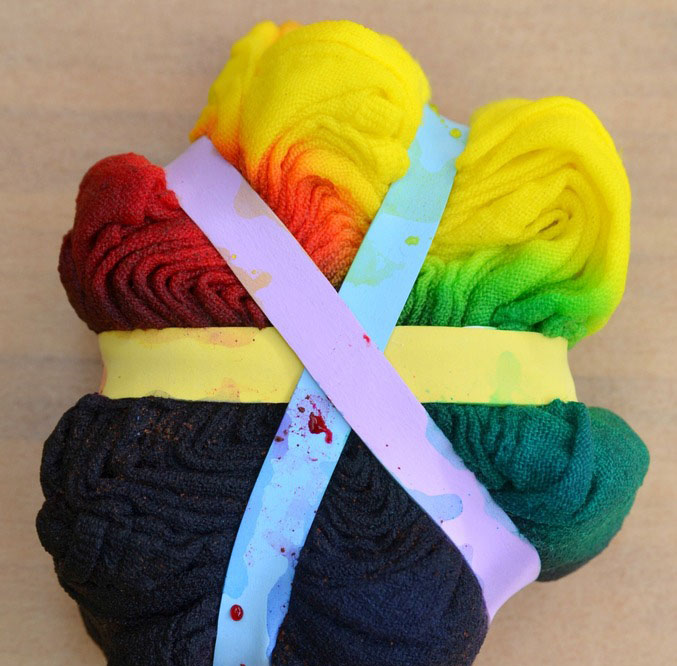
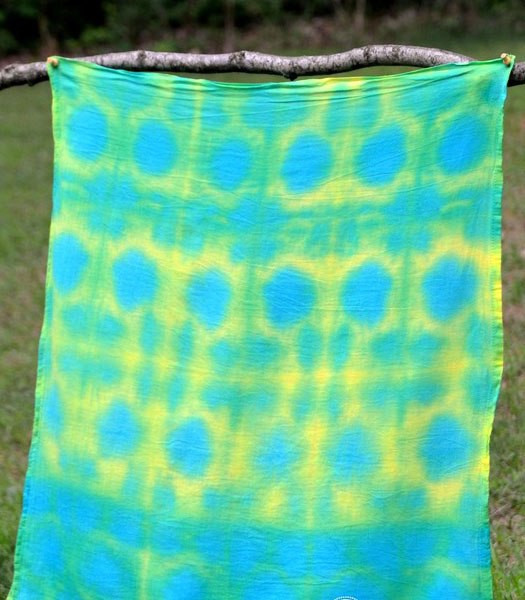
folded technique
Lay the fabric flat.
Fold the fabric in half.
Fold the fabric in half again, then fold in half once more. At this point you will have a rectangle shape.
Fold the fabric in thirds.
Apply one color dye to the outer folded edges – then using a second color, apply dye to the four corners and the center.
Flip the fabric over and repeat on the backside.
|
|
