macrame
objective: students will learn various types of knot tying techniques that can be used repetitively to create a piece.
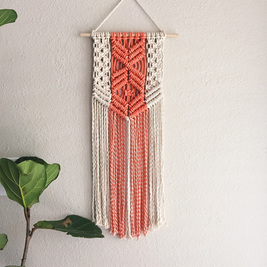
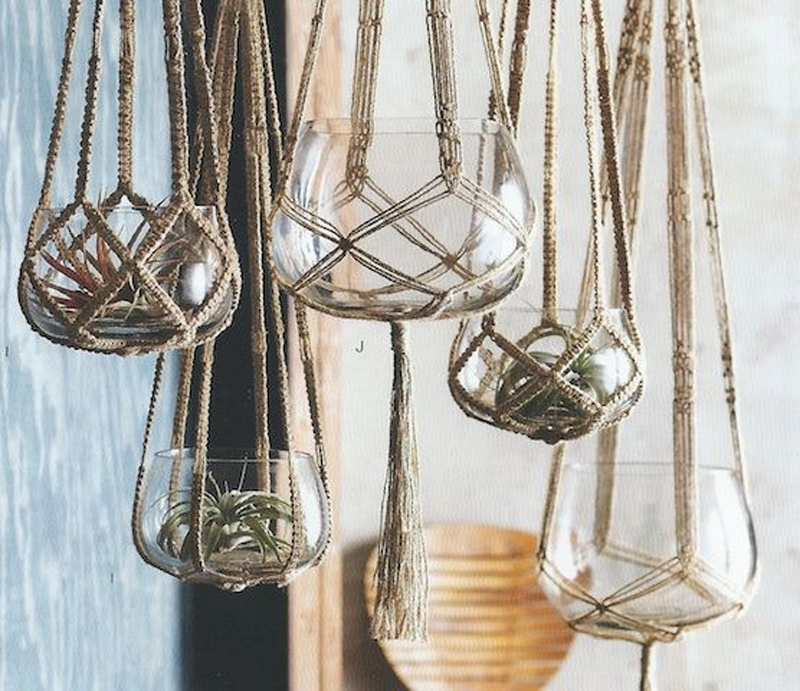
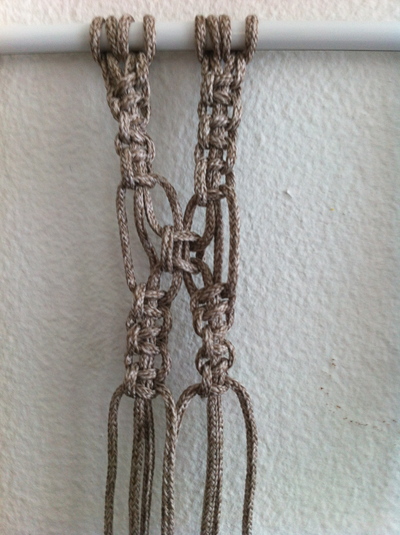
here are some unique examples of macrame in use.
|
Macrame patterns and knots are an easy and affordable craft to learn.. It requires very few tools and just some simple knowledge of basic knots.
|
|
|

|
key terms
Here are a few terms that you need to know before you get started:
- Knotting cord. This is the cord or set of cords that is used to make the knot for any given stitch.
- Knot-bearing cord. This is the cord or set of cords that the knotting cords are wrapped around.
- Sennit. This refers to a set of the same stitch worked in repeat. For example, if you work 6 half knot stitches in a row then you have a sennit of 6 half knots.
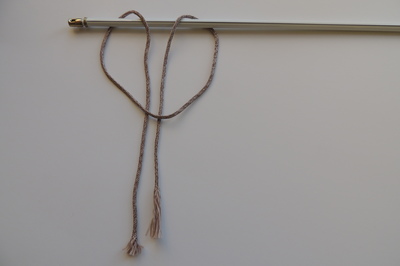
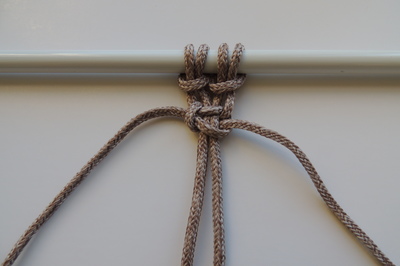
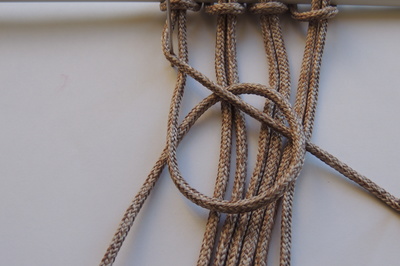
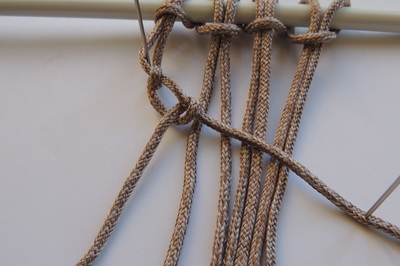
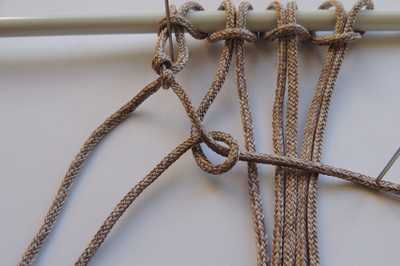
reverse larkshead knot
|
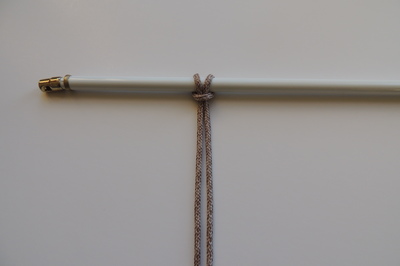
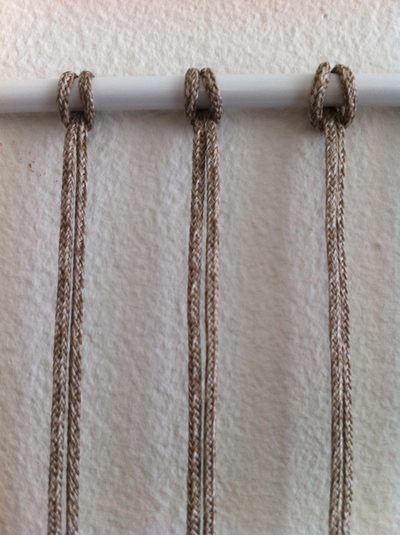
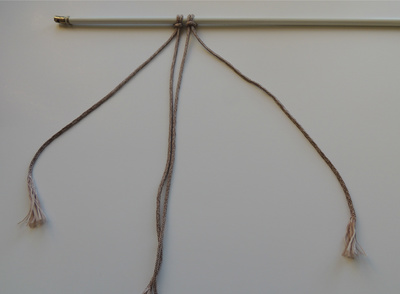
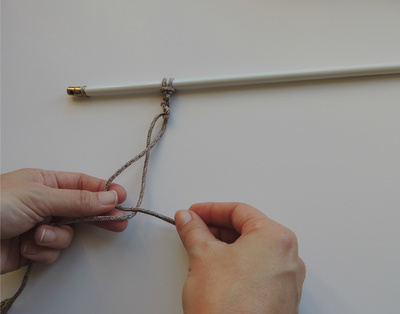
The Reverse Larkshead Knot is a popular choice for attaching your macrame cords to the dowel, rod or ring at the top of the project.
|
|
|
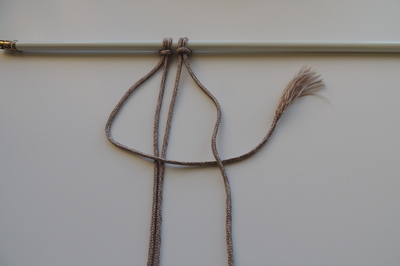
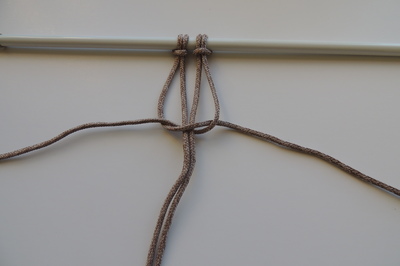
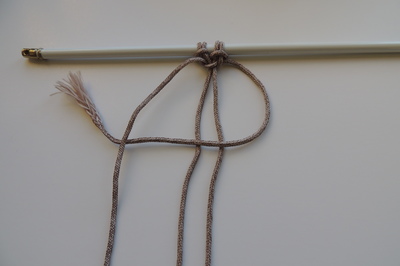
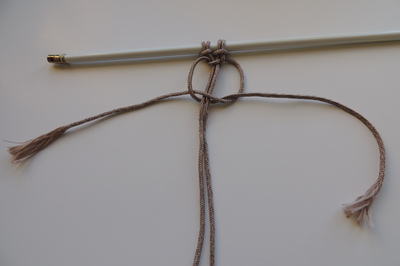
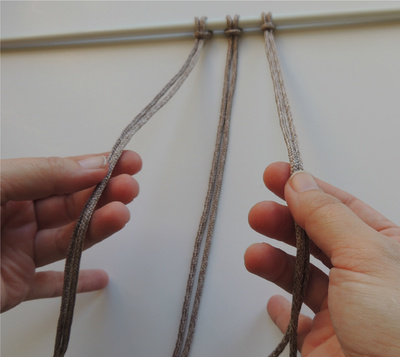
Fold one macrame cord in half. Place it loop down beneath your dowel with the cords facing up.
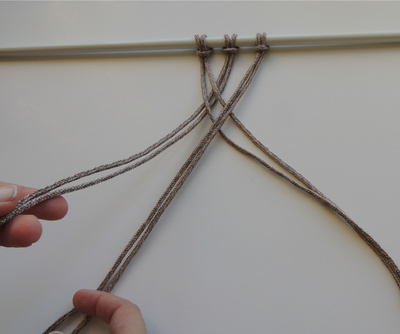
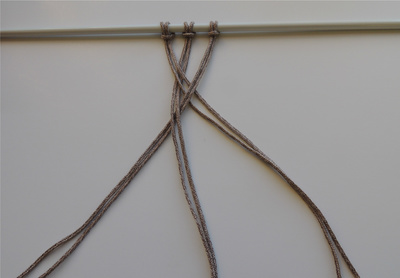
Pull the loop up over the dowel. Pull the cords down through the loop, creating a pretzel shape. Pull the two cords together to secure the knot at the top. |
half knot
This tutorial shows the Half Knot worked with four cords. The two outer cords are the knotting cords and the two middle cords are the knot-bearing cords.
|

Bring the left knotting cord to the right over the two knot-bearing cords and underneath the right knotting cord.
|
|
Bring the right knotting cord to the left under the two knot-bearing cords and over the left knotting cord. Pull to secure the half knot.
|

|

|
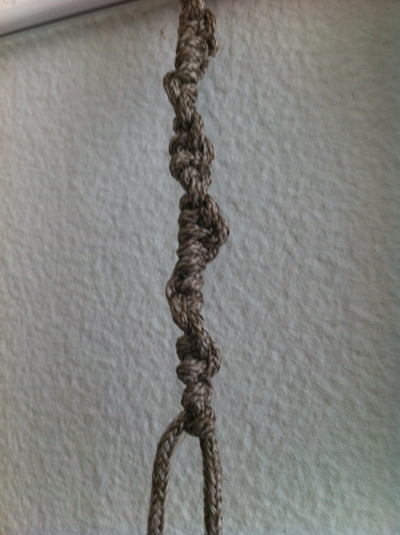
If you work a sennit of half knots, they will begin to naturally spiral:
|
|
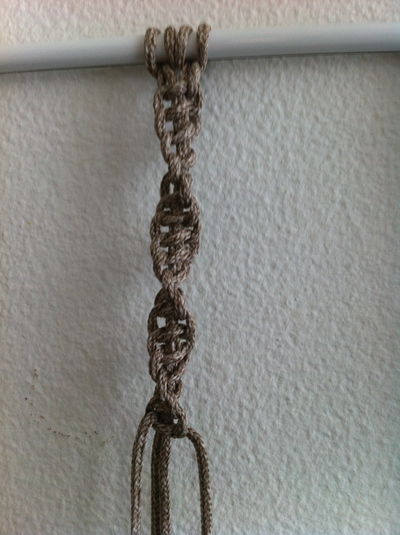
square knot
The Square Knot is a continuation of the Half Knot. (The "half" refers to "half of the square".) So you work the first part of the knot just like a half knot then you finish the square by working another half knot using the opposite cords. Here is what the whole square knot looks like, step by step:

|
|
|

|
The first four sets above are the exact same steps as the steps for the half knot.
|
Next we'll do the reverse: Bring the right knotting cord to the left over the two knot-bearing cords and underneath the left knotting cord.
Bring the left knotting cord to the right under the two knot-bearing cords and over the right knotting cord. Pull to secure the square knot. Pull strands tight and repeat. See if you can create a sennit. |
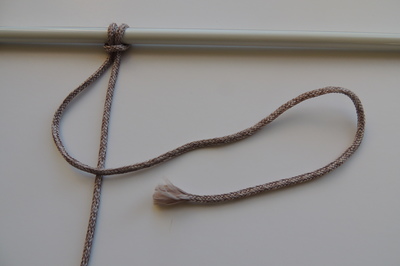
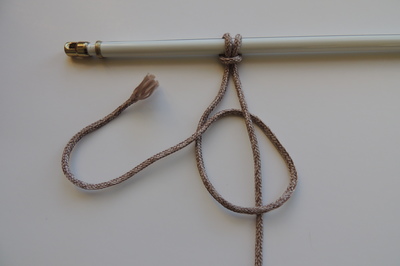
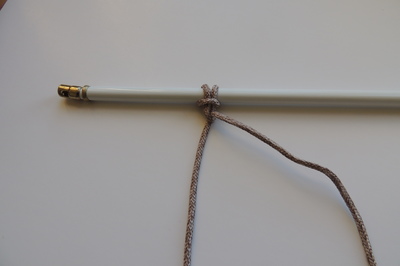
vertical half-hitch
There are several variations of the Half Hitch Knot. This shows a Vertical Half Hitch worked with two cords, using the left cord as the knotting cord and the right cord as the knot-bearing cord. This is also known as a "left over right half hitch".
|
|
Bring the left (knotting) cord over the right (knot-bearing) cord.
Wrap the knotting cord all the way around the knot-bearing cord, creating a loop by bringing it under the knotting cord and back over itself.
Wrap the knotting cord all the way around the knot-bearing cord, creating a loop by bringing it under the knotting cord and back over itself.
|
|
Pull to secure the Half Hitch.
Repeat for a sennit. A sennit of Half Hitch knots will naturally begin to spiral:
Repeat for a sennit. A sennit of Half Hitch knots will naturally begin to spiral:
The set of instructions above shows the Half Hitch worked vertically with just two cords. You can work it with a number of different knotting cords and knot-bearing cords. In a Horizontal Half Hitch, you might have one knot bearing cord with six or eight knotting cords hitched across it.
diagonal half-hitch
The Diagonal Half Hitch is similar to the Horizontal Half Hitch mentioned above. The difference is the knot-bearing cord is pinned diagonally before the stitches are worked. Here are the instructions:
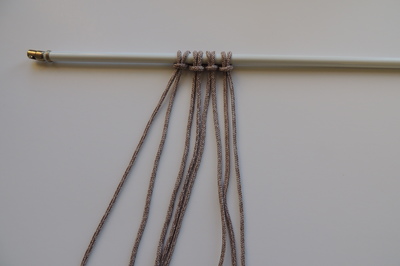
Secure your cords to the dowel. These are secured with the Reverse Larkshead Knot (shown above). In our example, the left cord will be the knot-bearing cord and all of the other cords will be knotting cords.

Secure the knot bearing cord with a pin to the left of the knotting cords.
|
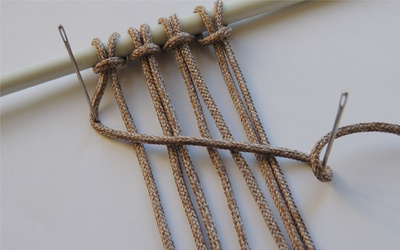
Hold the knot-bearing cord at a diagonal across the knotting cords. Pin it to the right of the knotting cords.
|
|
Start with the first (further left) knotting cord. Loop it over the knot-bearing cord and under itself.
|
|
Use the same knotting cord. Loop it again over the knot-bearing cord and then through the loop created between itself and the first time it was knotted. Pull to secure.
|
|
Repeat the previous two steps with each knot-bearing cord from left to right until you reach the end of the diagonal.
|
This is a left-to-right Diagonal Half Hitch. You can create a right-to-left Diagonal Half Hitch as well. This is done by using the furthest right cord as the knot-bearing cord and the other cords as the knotting cords, worked right to left instead of left to right.
A Horizontal Half Hitch would be worked the same way but with the knot-bearing cord pinned horizontally across the piece.
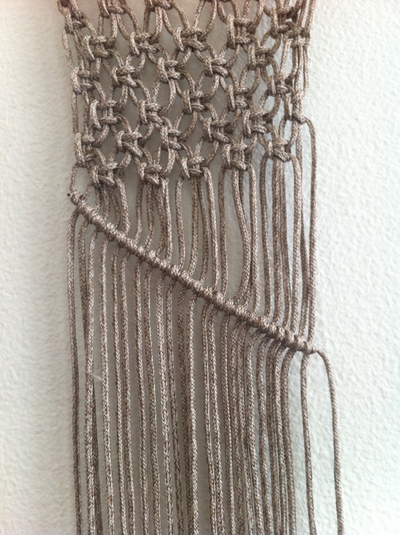
Note: The image above shows a Diagonal Half Hitch below a series of alternating Square Knots. Square Knots are often alternated this way in macrame patterns. This is done by doing a row of Square Knots as shown above worked side-by-side and then a row beneath them worked using the middle cords. (So if you have 8 cords, you would work 2 Square Knots next to each other, one with the first 4 cords and one with the second 4. Then you would do a Square Knot beneath them with the four middle cords. It would look somewhat like the center section shown below:
A Horizontal Half Hitch would be worked the same way but with the knot-bearing cord pinned horizontally across the piece.
Note: The image above shows a Diagonal Half Hitch below a series of alternating Square Knots. Square Knots are often alternated this way in macrame patterns. This is done by doing a row of Square Knots as shown above worked side-by-side and then a row beneath them worked using the middle cords. (So if you have 8 cords, you would work 2 Square Knots next to each other, one with the first 4 cords and one with the second 4. Then you would do a Square Knot beneath them with the four middle cords. It would look somewhat like the center section shown below:
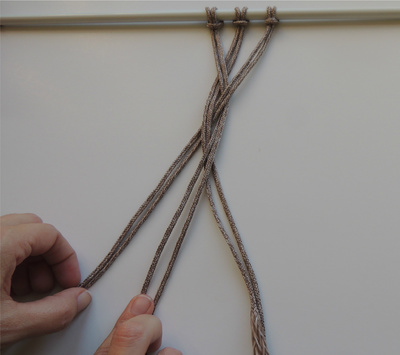
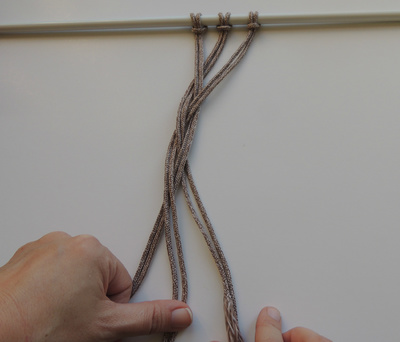
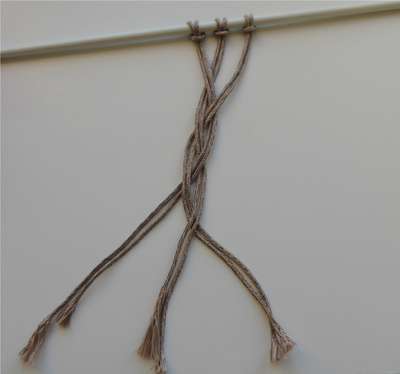
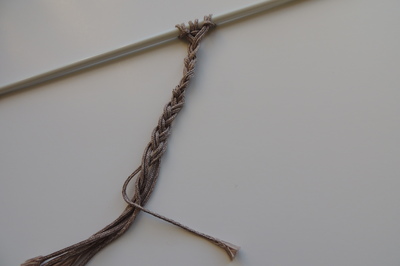
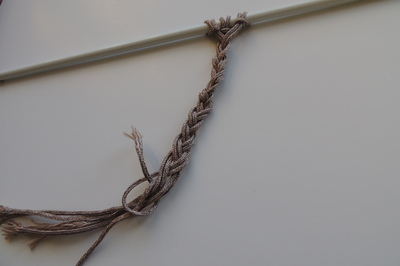
traditional braid with half hitch and overhand knot
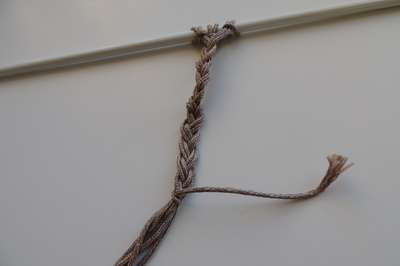
You can incorporate traditional braiding into macrame. However you need to secure the bottom of the braid with macrame knots so that the braids don't unravel. Here are the instructions for a basic braid (the same as the braid commonly used when braiding hair), secured with a sennit of five Vertical Half Hitch Knots and then an Overhand Knot. The Overhand Knot is similar to the Half Hitch, except that it is worked with one cord looped over itself (rather than looped over a second knot-bearing cord).
|
|
This braid is worked using two cords for each of the three sections. We'll call them Set 1, Set 2 and Set 3, numbered left to right as shown above.
|
|
Bring Set 2 across Set 3.
|
|
Bring Set 1 across Set 3. Bring Set 2 across Set 1.
Repeat the pattern until your braid is as long as you want it to be.
The further left cord is going to be the knotting cord. The others all serve together as the knot-bearing cords. Wrap the left cord around the right in a Vertical Half Hitch (shown above). You can see what this looks like below:
|
|
You can secure the braid with a single Vertical Half Hitch but it's more common to work a sennit of 5 or 6 Half Hitches.
Use an Overhand Knot to fully secure the stitch. Using the same knotting cord as before, make a loop of the knot on itself on the right hand side of the braid.
Use an Overhand Knot to fully secure the stitch. Using the same knotting cord as before, make a loop of the knot on itself on the right hand side of the braid.
