YOUR OBJECTIVE: STUDENTS SHOOT A SERIES OF PHOTOS INSPIRED BY ALFRED STIEGLITZ AND WILL USE FILTERS AND ADJUSTMENT LAYERS IN PHOTOSHOP TO MIMIC THE LOOK AND CHARACTERISTICS OF STIEGLITZ'S PHOTOGRAPHS.
| vintage_film1.jpg |
| vintage_film5.jpg |
| vintage_film10.jpg |
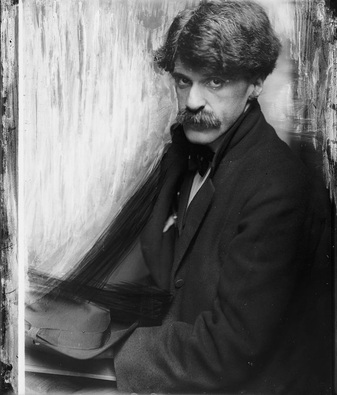
ALFRED STIEGLITZ
|
|
your assignment:
|
|
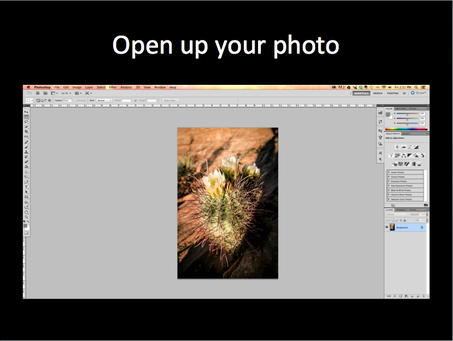
PHOTOSHOP INSTRUCTIONS:
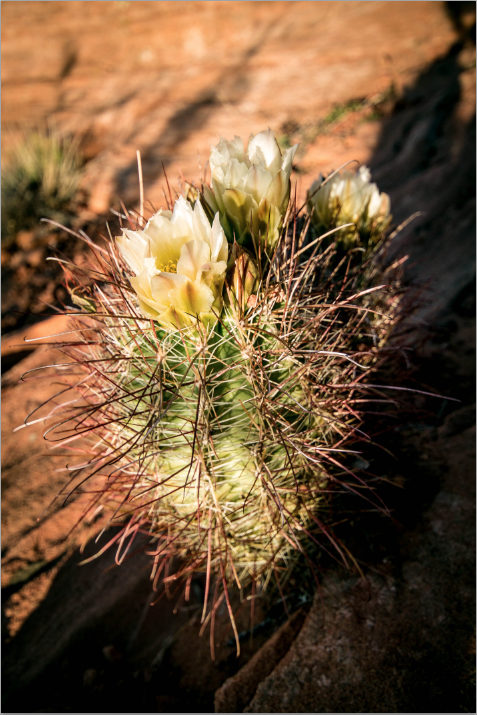
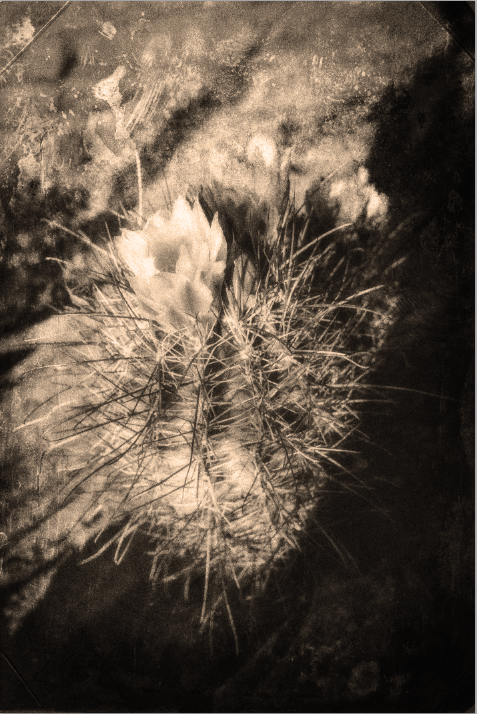
before & after
|
|
|
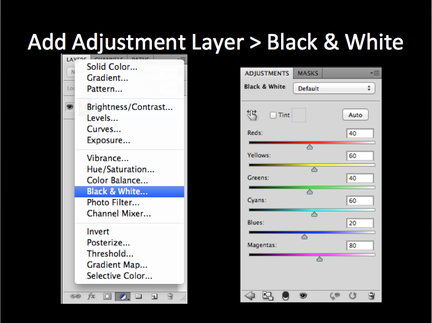
Let's make your photo black and white...
Click on your "add adjustment layer" button on the bottom of your layers panel. Choose "Black & White" |
|
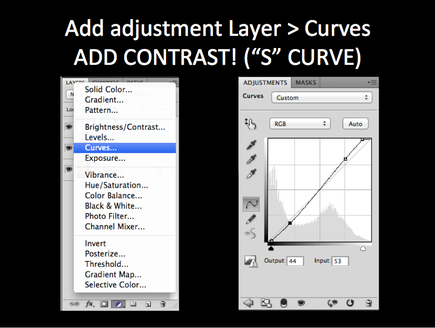
Now let's add some contrast...
Click once more on your "add adjustment layer" button on the bottom of your layers panel. This time, select "curves" Make a slight "S" CURVE to increase the contrast ( click towards the top of the diagonal line and push slightly up. then click towards the bottom of the diagonal line and push slightly down.) |
|
|
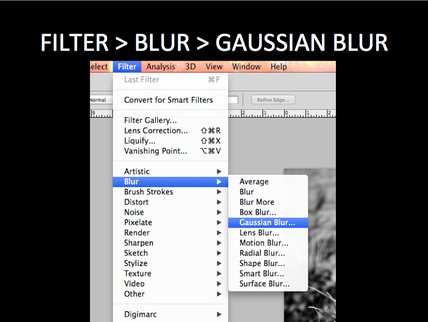
Now go to "Filter > Blur > Gaussian Blur"
|
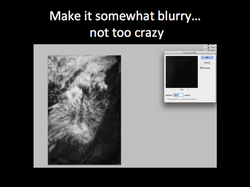
Increase the blur.
You want it slightly blurry, so you can no longer make out the details, but not CRAZY blurry. Just a bit!
You want it slightly blurry, so you can no longer make out the details, but not CRAZY blurry. Just a bit!
|
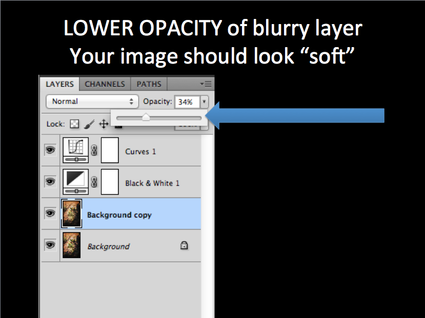
Now, You are going to LOWER THE OPACITY of that blurry layer to let a bit of the clear layer beneath it show through.
This should give your photo a very "soft" look to it, similar to Stieglitz's photos. |
|
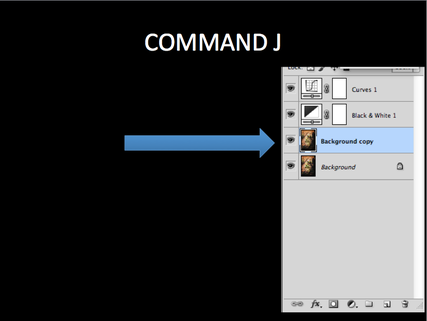
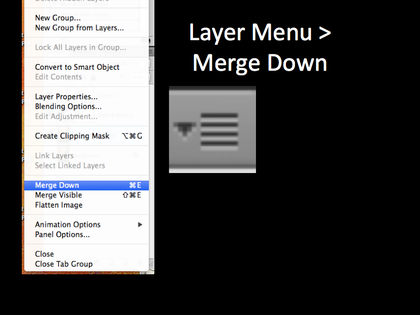
Making sure your "background copy" layer is selected, click on the "layer menu" icon in the top right-hand corner of your layers panel.
Select "Merge Down." This should combine your two bottom layers into one. |
|
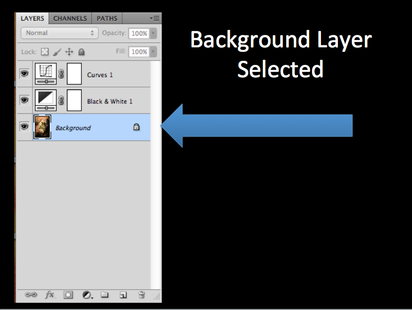
Make sure your background layer is selected.
|
|
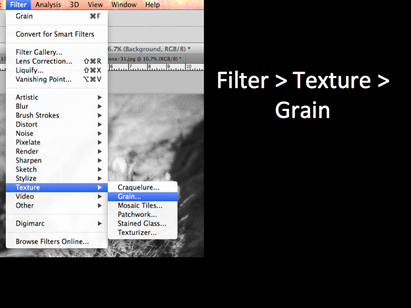
Now go to "Filter > Texture > Grain"
|
|
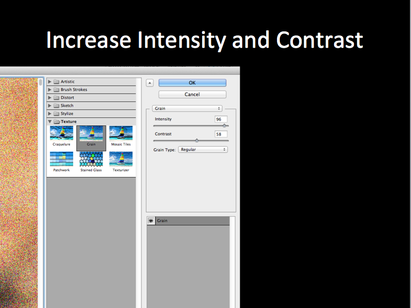
Increase the Intensity and Contrast to your liking.
|
|
|
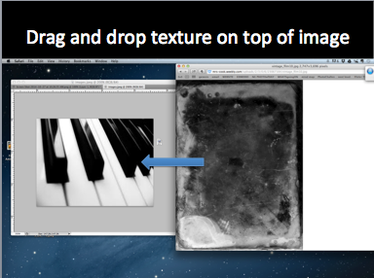
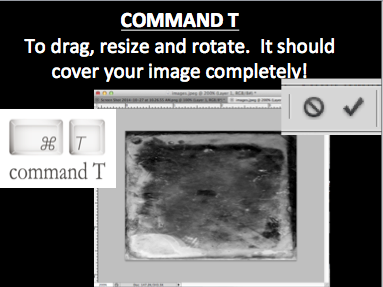
- Hit "Command" and "T" on your keyboard (FREE TRANSFORM).
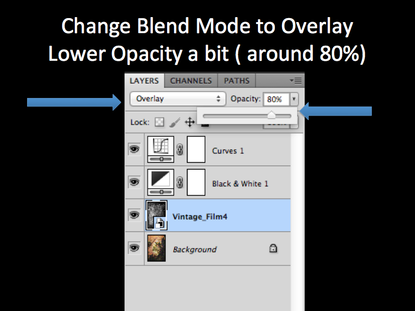
- Now you can drag out your image, resize it, move it and rotate it. - Make it so that your texture COVERS YOUR IMAGE COMPLETELY. - (HINT: I find it easier to hit "Command" "Minus Sign" to zoom out a bit, and then drag out my document window so I can see my entire image better) - Hit the "Confirm" Check Mark button in your options bar when you are done. - Making sure that your texture layer is selected (and on top of your background layer)... - In the top-left corner of your layers panel, choose "Overlay" as your blend mode. - If the effect is too strong, lessen the opacity of your texture layer. Try around 80% or so. |
|
OPTIONAL:
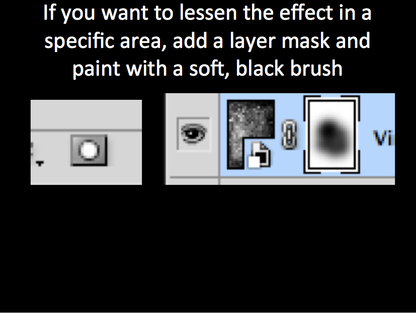
- If you want to lessen the textured effect even more in a specific area (probably your focal point) then add a layer mask. - Click on your layer mask, and use your paint brush with black paint, a soft edge brush and a lower opacity to paint away the effect in the desired location. |
|
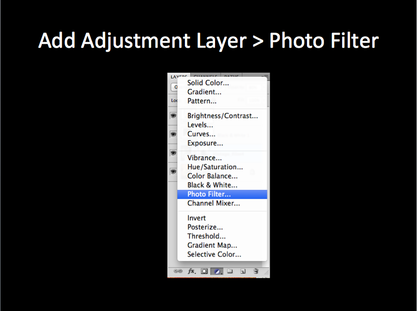
- Now let's give our photo a sepia tint to it...
- Click on your "add adjustment layer" button at the bottom of your layers panel. - Choose "Photo Filter..." |
|
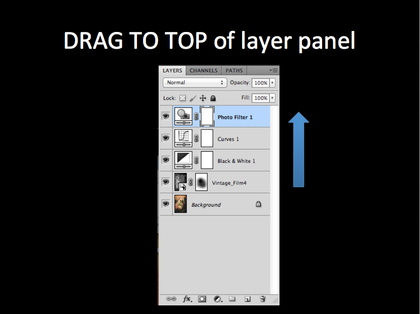
- Drag your "Photo Filter" Layer to the TOP of your layers panel.
|
|
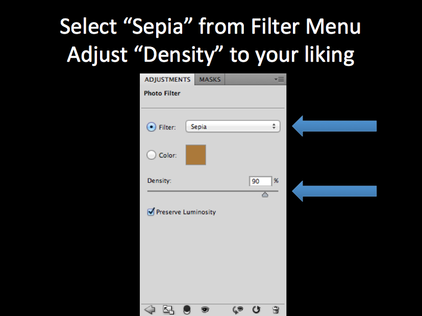
- In the Photo Filter Adjustment Panel, select "Sepia" from the drop-down menu.
- Adjust the "Density" slider to lessen or intensify the effect to your liking. |
|
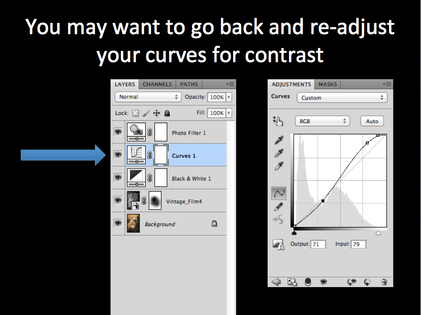
- You are just about done! Take a look at your photo and see if the contrast needs any more adjusting. IF so...
- Click back on your Curves adjustment layer from earlier (no need to make a new one). -Re-adjust the curves to increase contrast if needed. (Remember... a slight "S" curve will increase contrast.) |
|
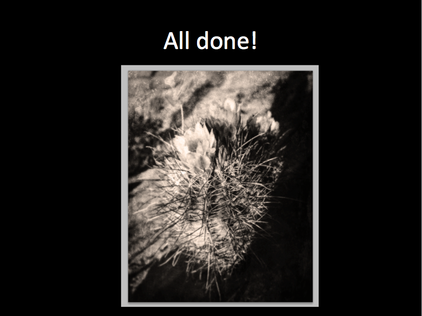
When finished, make a second photo following the instructions above.
Save each file as "YOUR NAME_Stieglitz1"/ "YOUR NAME_Stieglitz2" Save each file TWICE... once as a photoshop document (.PSD) and once as a JPEG. Submit via GOOGLE DRIVE. |
