objective: students will take inspiration from nj teen photographer and photograph their own view of life through a marble.
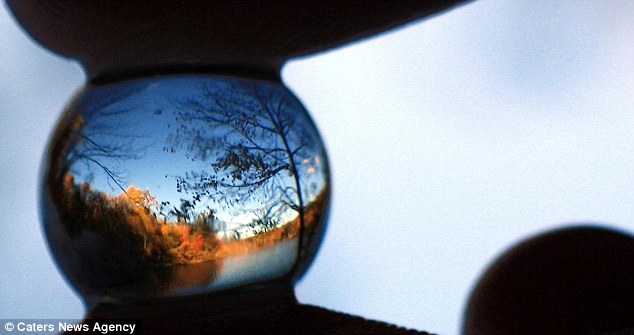
A teenager has come up with an extraordinary way of taking interesting photographs - but he has not lost his marbles, indeed he is instead using a clear marble as his point of focus, and the bizarre technique has led to some breath-taking images.
Caleb Tenenbaum, a 16-year-old from New Jersey, only took up photography last August after seeing a photographic exhibition in which the snapper had used a crystal ball to create a similar effect.
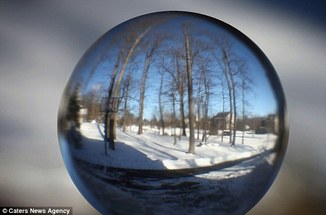
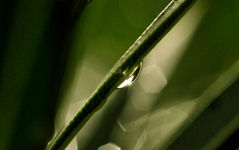
The teen has entitled a collection of his photographs 'Life Through a Marble' where he has used a 1cm marble as a view finder on the landscape around where he lives.
Tenenbaum dreamt up the idea after seeing other snappers produce similar collections, but with much larger crystal balls.
He said: 'I saw a few pictures taken of flowers in water drops or scenes in giant crystal balls and I thought I could take the idea of refractions and reflections, innovate it, and make it my own.'
'I realized I had discovered something pretty special when I took the first picture. Before even processing it I realized it all worked perfectly. The focus was superb, the composition was right on, and it was eye-catching.'
Caleb Tenenbaum, a 16-year-old from New Jersey, only took up photography last August after seeing a photographic exhibition in which the snapper had used a crystal ball to create a similar effect.
The teen has entitled a collection of his photographs 'Life Through a Marble' where he has used a 1cm marble as a view finder on the landscape around where he lives.
Tenenbaum dreamt up the idea after seeing other snappers produce similar collections, but with much larger crystal balls.
He said: 'I saw a few pictures taken of flowers in water drops or scenes in giant crystal balls and I thought I could take the idea of refractions and reflections, innovate it, and make it my own.'
'I realized I had discovered something pretty special when I took the first picture. Before even processing it I realized it all worked perfectly. The focus was superb, the composition was right on, and it was eye-catching.'
|
|
your project:
Photograph using Manual Mode Settings:
-Manual Focus
-Program your camera based on where you are shooting, you can also use AV mode to help program.
-NO FLASH...Why?!?!.... (NOTE-Macro mode will give you automatic flash)
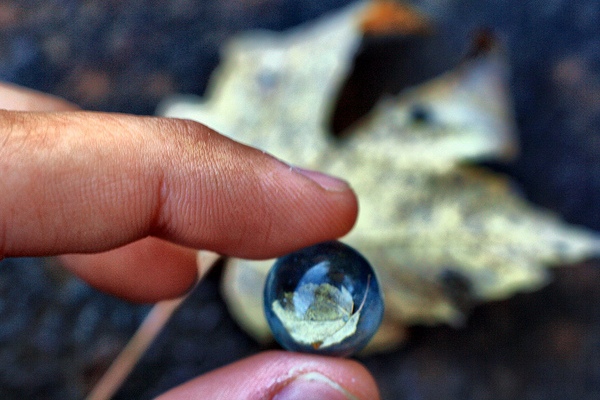
Shoot CLOSE to your marble, being sure that the sun is hitting the reflective glass but not too much to make any sort of glare.
DO NOT ZOOM IN on the lens, use your body and self to zoom, this will help keep your photograph sharp. GET CLOSER, think of our recent MACRO PHOTOGRAPHY LESSON.
Be really specific when focusing in MANUAL MODE, it is important to get just the right amount of sharpness.
-Manual Focus
-Program your camera based on where you are shooting, you can also use AV mode to help program.
-NO FLASH...Why?!?!.... (NOTE-Macro mode will give you automatic flash)
Shoot CLOSE to your marble, being sure that the sun is hitting the reflective glass but not too much to make any sort of glare.
DO NOT ZOOM IN on the lens, use your body and self to zoom, this will help keep your photograph sharp. GET CLOSER, think of our recent MACRO PHOTOGRAPHY LESSON.
Be really specific when focusing in MANUAL MODE, it is important to get just the right amount of sharpness.
Science, physics, & art?
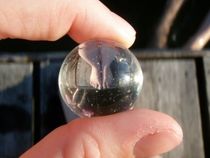
Why is your image upside down? A little scientific physics term called refraction. Refraction is the action of distorting an image by viewing through a medium. The fact or phenomenon of light, radio waves, etc., being deflected in passing obliquely through the interface between one medium and another or through a medium of varying density.
What about reflection? A reflection is an image that is seen in a mirror or on a shiny surface. Many times when used in photography, reflections add interest, detail, and uniqueness to a photograph making it better or more exciting to view!
In this project, you will utilize refraction and change the photograph to be right side up in Photoshop after shooting.
Photoshop:
Use basic photo editing steps including:
CROP
IMAGE>ADJUSTMENTS>LEVELS
FILTER>SHARPEN>UNSHARP MASK
Double click the background layer to unlock it. Click OK. Then use EDIT>TRANSFORM ROTATE OR FLIP 180 Degrees. Flip your photograph so that the image is right side up!
CROP
IMAGE>ADJUSTMENTS>LEVELS
FILTER>SHARPEN>UNSHARP MASK
Double click the background layer to unlock it. Click OK. Then use EDIT>TRANSFORM ROTATE OR FLIP 180 Degrees. Flip your photograph so that the image is right side up!
Extension:
Finished already? Need another challenge? Try using bubbles, raindrops, magnifying glass, glass bottle, or any other reflective/refractive surface to get a unique photograph!
|

|
|
