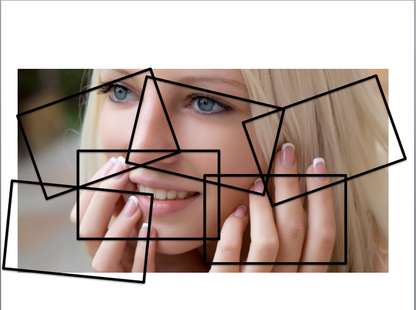
OBJECTIVES: STUDENTS WILL USE LAYERS IN PHOTOSHOP TO COMBINE MULTIPLE VIEWPOINTS OF A SUBJECT INTO A SINGLE IMAGE, SIMILAR TO DAVID HOCKNEY'S "JOINERS."
DAVID HOCKNEY
- Born 1937
- English painter, draughtsman, printmaker, stage designer and photographer.
- Interested in how 3-dimensional space can be portrayed in a 2-dimensional image.
- Combined multiple viewpoints of a single subject into a photographic collage called a "joiner"
- Joiners aimed to create an image that was able to show reality how we experience it (in fragments, not as a whole), and to show the passage of time.
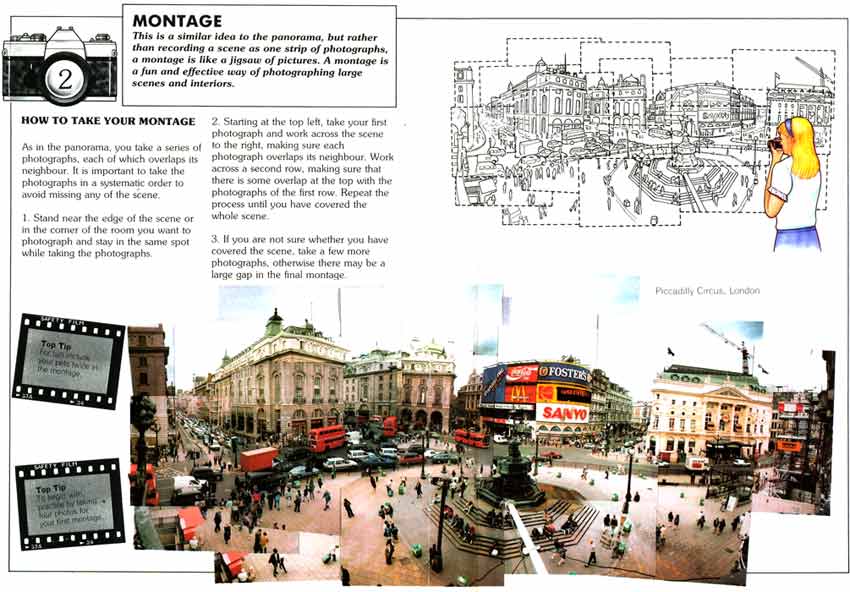
SHOOTING INSTRUCTIONS
|
PHOTOSHOP INSTRUCTIONS
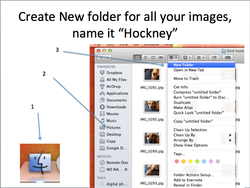
STEP 1: CREATE A FOLDER FOR YOUR PHOTOS!
|
- First, create a folder with all of your 40+ photographs in it.
- Click on your finder in the bottom-left hand corner of your desktop. (Blue Face icon) - On the left-hand side, click on your "Pictures" folder. - Now click the Gear Button at the top. - Select "New Folder" from the drop-down menu. - Rename your new folder after the assignment- "Hockney Photos" or something similar. |
|
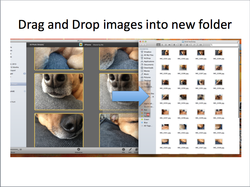
- To add your photos to the folder, keep your new "Hockney" folder open and visible on your desktop.
- Then open up iPhoto, highlight and drag and drop your photos from iPhoto into your new folder. - Drag them ALL over, even if there are some you think you do not want to use. |
STEP 2: CREATE A NEW, BLANK CANVAS IN PHOTOSHOP!
|
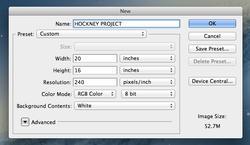
- Create a name for your new file "Hockney- Last Name"
- Make your width and height 16 by 20 inches (vertical) or 20 by 16 inches (horizontal). - Make resolution 240 ppi (pixels/inch). - Choose background contents. - Click OK. |
STEP 3: DRAG AND DROP YOUR PHOTOS ONTO YOUR CANVAS
|
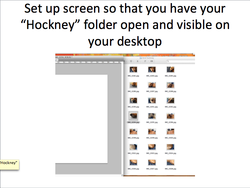
- Set up your screen so that you have your "Hockney" photo folder OPEN and VISIBLE on your desktop behind your photoshop workspace.
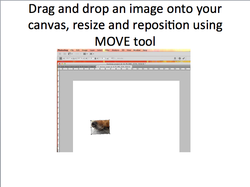
- Choose a photo from your Hockney folder and drag and drop it on top of your canvas in Photoshop. |
|
- Use your MOVE tool to RESIZE the image, MOVE it and ROTATE it to where you want it.
- Make sure you make it small enough that you can fit all of your other photos on the canvas. -HINT: HOLD DOWN THE SHIFT KEY ON YOUR KEYBOARD WHILE YOU RESIZE YOUR IMAGE!!! This will keep the ratio the same as you re-size, so your image doesn't get "squooshed" or "stretched out" looking! - Click the "Commit" Check Mark in your tool options bar when you are done re-positioning it. |
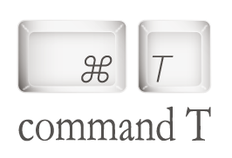
TROUBLE RE-SIZING? HIT "COMMAND T" ON YOUR KEYBOARD (FREE TRANSFORM)
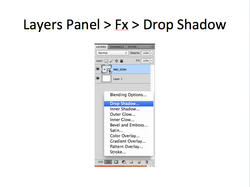
STEP 4: ADD A SHADOW TO YOUR PHOTO!
|
- To make it look more like an actual photo collage, we will add a shadow underneath each image.
- To do this, look in your layers panel and click on the FX button on the bottom. - From the Fx menu, select "Drop Shadow" |
|
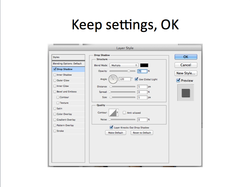
- You can keep the settings as they are, or if you want to, play around with them to change the size, direction and darkness of your shadow.
- When finished, click OK. |
STEP 5: REPEAT STEPS 3 AND 4 WITH ALL OF YOUR OTHER PHOTOS UNTIL YOUR IMAGE IS COMPLETE!
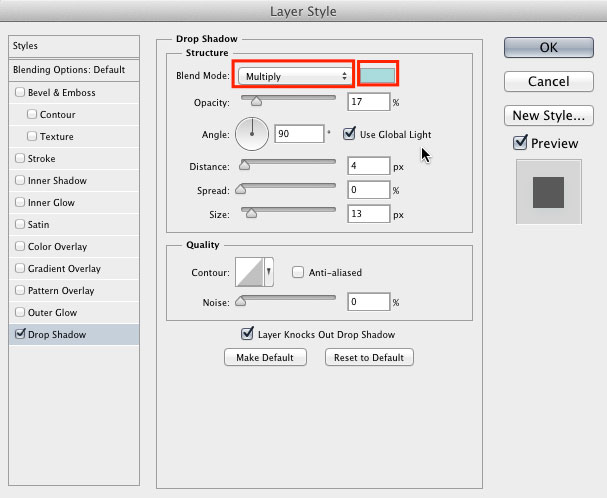
step 6: add drop shadows to show the differences in photographs.
|
-Double click your layer.
-Go to Drop Shadow and click on the title -Change the distance, spread, and size of your drop shadow. -You can also change the blend mode to normal and the color. -REPEAT FOR EVERY PHOTOGRAPH ON YOUR PROJECT. |
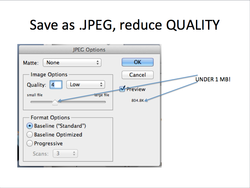
STEP 7: SAVE AND TURN-IN via Google drive.
|
- When finished, go to FILE > SAVE AS and save your image as YOUR NAME_HOCKNEY.JPEG
- Click OK. - When the ".JPEG Options" box pops up, REDUCE YOUR IMAGE QUALITY to decrease the file size. - Notice what size your file is on the right-hand side of the box, you want to reduce quality until it is under 1 MB. - Then click OK. |
