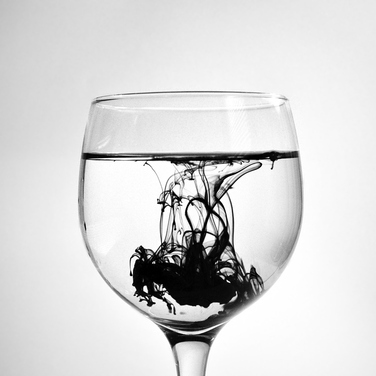
OBJECTIVES: STUDENTS WILL USE A FAST SHUTTER SPEED IN TV MODE TO PHOTOGRAPH INK AS IT DISPERSES IN WATER.
|
SHOOTING
|
|
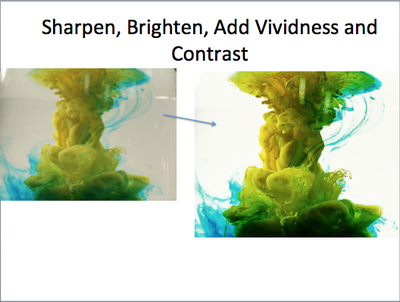
- What we will do to our photos:
- Crop
- Lighten background
- Sharpen
- Remove Spots
- Add contrast with Curves
- Adjust color with Color balance.
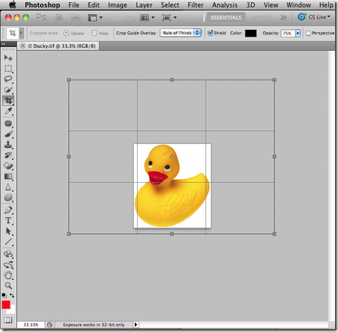
- First, let's CROP the area you want to keep!
- Draw the crop tool around the area you want to keep and hit enter/return.

- Next you want to adjust the LEVELS of the photograph. Using levels will even out the amount of light and darkness in your photograph.
- Pull the sliders to the right and left to adjust the levels.
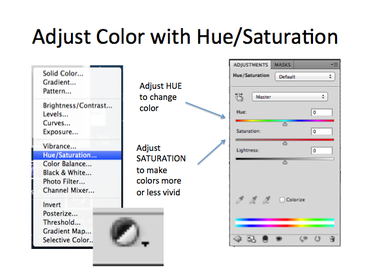
- Next, you may want to experiment with changing the colors a bit.
- To do this, add a " hue/saturation adjustment layer" by clicking on the "add adjustment layer button" (looks like a black and white cookie) and then selecting "hue/saturation"
- Move the HUE slider to change the color of your ink.
- Move the SATURATION slider to change the intensity of color.
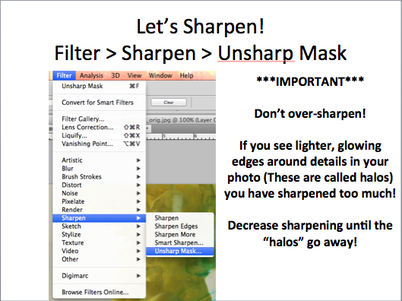
- Let's sharpen our image!
- To do this, go to Filter > Sharpen > Unsharp Mask
- Adjust the sliders to sharpen to your liking.
- Be careful not to OVER-SHARPEN! It looks bad!
- If you see lighter, glowing edges appear around the details in your photo, you have over-sharpened. (these are called halos)
- Decrease the sharpening until the "halos" go away.
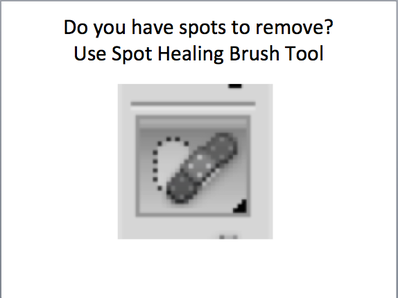
- If you have any spots on the glass or in the background that you would like to get rid of, use a RE-TOUCHING TOOL to get rid of them.
- Use the SPOT HEALING BRUSH TOOL to get rid of small spots.... Just adjust your "brush size" so that it is large enough to cover the spot and then click once to remove.
- You can also try the Healing Brush Tool, Patch Tool or Clone Stamp Tool for tougher/larger areas... see me for help!
