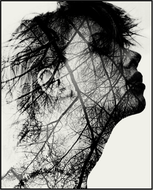
OBJECTIVES: STUDENTS WILL USE PHOTOSHOP TO CREATE A DOUBLE EXPOSURE PORTRAIT.
+
|
|
=
|
|
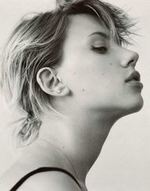
STEP 1: SHOOT PORTRAIT SHOT
- Side-profile works best, also try 3/4 view. (Use one of the photographs we used for High Contrast Portrait)
- Think about your facial expression- this can make or break your final image... play around with different expressions/emotions/poses.
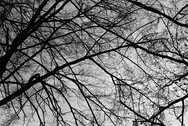
STEP 2: SHOOT OVERLAY SHOT
- Focus on shooting interesting TEXTURES, LINES, FILL THE FRAME.
- Natural elements work great... try trees, branches, leaves, clouds, plants, etc.
- Look for good contrast between positive and negative space (contrast between white sky and black branches)
- You may also use an image from the internet, be sure it is a High Resolution Photograph.
STEP 3: PHOTOSHOP
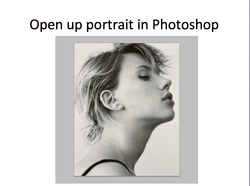
- Open up your portrait shot in Photoshop.
|
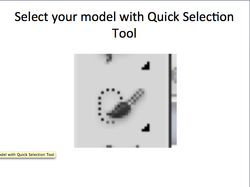
- Select your model using your quick selection tool.
|
|
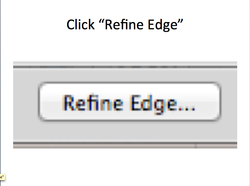
- In your tool options bar, click "Refine Edge"
- This will help us better select hard-to-get eyes around your hair. |
|
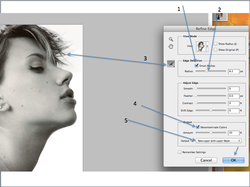
-1.) Check the "smart radius" box
-2.) Underneath that box, increase the radius size slightly... notice how much of your edges are getting "picked up" in the preview screen. -3.) Use the paint brush to paint around edges of hair. -4.) Check "Decontaminate Colors" -5.) Make sure "New Layer with Layer Mask" is selected in the drop-down box at the bottom. Click Ok |
|
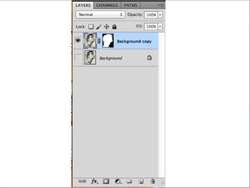
- Your model should now be on a gray/white checked background.
- In your layers panel you will see that you still have your original image (called background) as well as a copy of that image with a layer mask blocking out the background. |
|
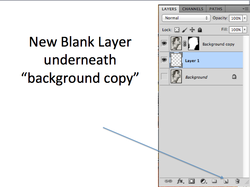
- Add a new BLANK layer.
- Do this by clicking the New Layer button at the bottom of the layers panel. - Drag that new layer down so that it is underneath "background copy" layer. |
|
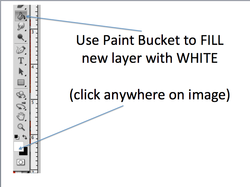
- Select your paint bucket.
- Select white as your foreground color. - Now click anywhere on your image to fill the background in with white. |
|
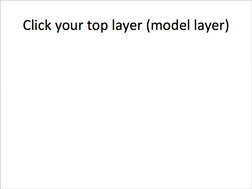
Click on your Model layer to select it.
|

|
- Go to File>Place
- Choose your "overlay photo" - Click the "confirm" checkmark in your options bar. |
|
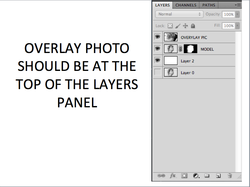
Your overlay photo should be at the top of your layers panel.
If its not, drag it there. It should block out your portrait layer |
|
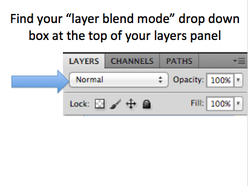
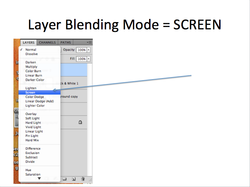
Find your "Layer Blend Mode" drop down box at the top of your LAYERS PANEL. |
|
- Select "SCREEN" from the drop-down menu.
|
|
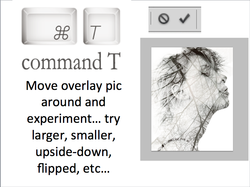
- Hit Command T
- Now reposition your overlay photo on top of your portrait. - You can move your overlay photo around, resize it larger or smaller, or try flipping it and rotating it to get different effects. - Experiment with this for a while until you find a look you are happy with. |
OPTIONAL: DO YOU WANT YOUR IMAGE BLACK AND WHITE?
|
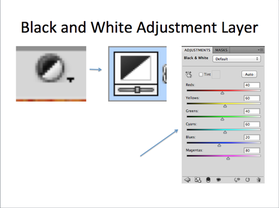
- Now we are going to make our image black and white.
- Click on your adjustment layer button at the bottom of your layers panel ("black and white cookie looking button..) - Select "Black & White" - Experiment with the color sliders in your adjustment panel to change the value and contrast. |
|
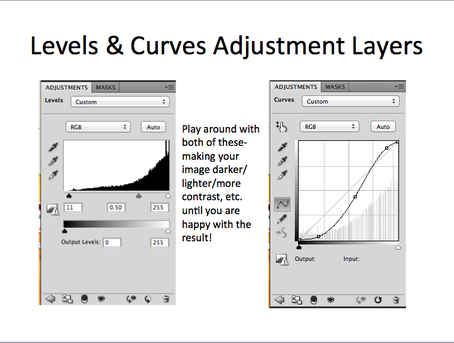
- Add 2 more adjustment layers- a levels adjustment layer and a curves adjustment layer.
- Experiment with both of these- make your image darker, lighter, or give it more contrast. - Experiment until you are happy with the look of your photo. -Reminder... adjustment layers always come with "masks" so if you like, you can choose to adjust only part of your image instead of the entire thing. Just use your black paint brush to mask out an area you don't want to be affected by your changes. |
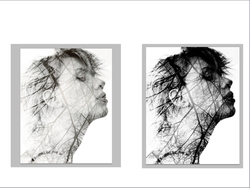
- Make your image look however you like it.
- You may like it "softer" looking, or you may like something more contrasty and dramatic.
- You may like it "softer" looking, or you may like something more contrasty and dramatic.
TIPS WHEN USING ADJUSTMENT LAYERS....
|
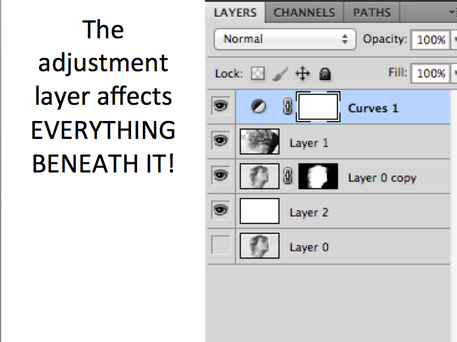
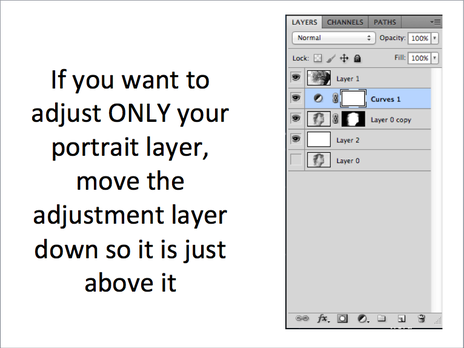
Keep in mind that when you add an adjustment layer (like levels or curves) that EVERY SINGLE LAYER BENEATH IT will be affected by the changes you make.
- So if I add a curves adjustment and the adjustment layer is all the way at the top of my layers panel (as shown), then the "overlay photo" and the portrait photo will BOTH be affected by the changes I make. |
|
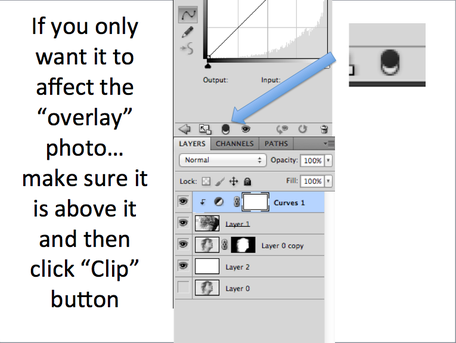
- If you ONLY want your adjustment to apply to the OVERLAY layer, then first make sure the adjustment layer is directly on top of the overlay layer.
- Then find the "clip layer" button in your ADJUSTMENT PANEL (usually directly above the LAYERS PANEL). It looks like a black circle over a white circle. - When you click it, you should see a little arrow show up on your adjustment layer. This is to show you that it is "clipped" to the layer beneath it, meaning your changes will ONLY affect the layer beneath it. |
|
If you only want to adjust your PORTRAIT LAYER, then slide your adjustment layer down so that it is directly above it, like shown.
|
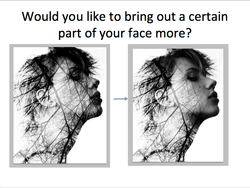
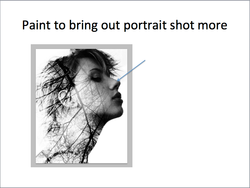
OPTIONAL: USING MASKS TO BRING OUT MORE OF YOUR FACIAL FEATURES?
|
- You can also choose to "bring out" more of your model's face in certain areas if you like.
|
|
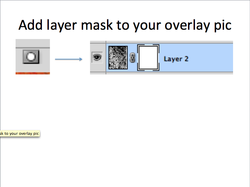
- To do this, click on your "overlay pic" layer (probably called layer 2)
- Click the "add mask" button at the bottom of your layers panel. - Make sure you have your mask icon selected by clicking on it (the white box that popped up next to your layer thumbnail) |
|
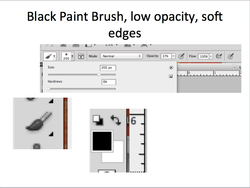
- Pick up your paint brush.
- Select a SOFT edge and a lower opacity so that you get a subtle shift and no harsh lines. |
|
-Paint with black to expose more of your model.
-If you make a mistake, paint with white to undo your changes. |

|
- When you are all done, crop your image to 8x10 inches or 10 x 8 inches, 300 resolution.
- Then save your work as a .JPEG. SAVE YOUR IMAGE AS "YOUR NAME_DOUBLE EXPOSURE" |
